Having been offered a job in Qatar, the hard work really begins. To try and ensure everyone who comes to work in the country is appropriately qualified and is likely to be an upstanding citizen, Qatar has strict policies with respect to the documentation you will need to provide before you will be granted a work visa.
The process has four steps:
- Obtain all the relevant paperwork. If the paperwork is in a language other than English you will need to have a translation made.
- Have the authenticity of every page of each document certified by a Notary Public
- Have the authenticity of every page of each document attested by the government of the country in which it was issued (the UK in my case)
- Have the authenticity of every page of each document (and so the each of the previous steps) attested by the Qatar Ministry of Foreign Affairs – first in your home country and then later in Qatar.
Step 1: Obtain all the relevant paperwork
While the exact documents may vary from employer to employer, these are the key documents Aspire Academy required me to provide:
- University Degree paperwork including:
- My original University Degree Certificate
- My original University Transcript – this includes all the grades that I obtained for every course while I was at University
- A cover letter from my University stating that all parts of my degree were conducted in person and that no parts was conducted online. This is important because Qatar does not recognize online degrees.
- A valid police check for emigration purposes
- A letter from my doctor stating that I was fit to work
- A copy of my marriage certificate (as I was bringing my wife with me to Doha)
If any of the above documents are not in English you will also need to have them translated (check with HR about the exactly how to do this as I don’t have any experience of this step). In addition to this list you may need to provide copies of you and your families passports and birth certificates of your children if you have any.
University Cover Letter
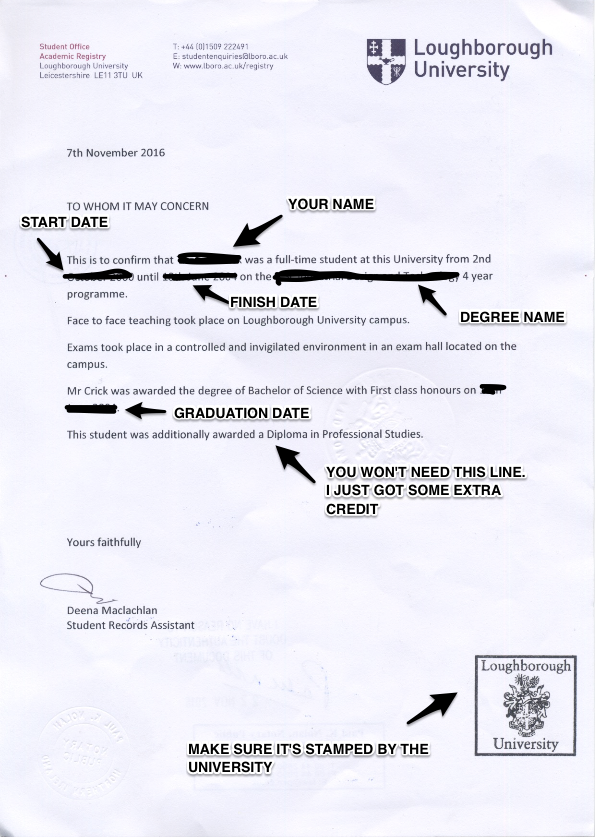
Here is my University Cover Letter which was accepted at the start of 2017. Check to make sure the required wording hasn’t changed before ordering yours! CLICK for a larger view.
The cover letter from your university needs to include ALL of the following things:
- The mode of study: whether full-time or part-time
- The type of study: whether distance learning (E-Learning) or Face to Face learning (on campus learning)
- Location of study
- Location of examinations
- The actual dates of study (start date and the end date)
Since this is quite non specific I have provided a copy of my letter that was accepted for you to copy. I would suggest asking your university to use the exact same wording and to just change the key information such as your name and dates.
Police Check
In the UK the police check is known as an ACRO Police Check. You can apply for it online HERE and it costs GBP 45.00. If you live in another country the process will be different but the basic idea is the same.
Doctor’s Letter
The doctor’s letter can be obtained from any licensed practitioner. When I went to my NHS doctor in the UK they charged me GBP 100.00 to write one for me. Each doctor will word this differently but make sure that no matter what they must include the line “Your Name is fit to work abroad”. This is important because the person assessing your letter may not have English as their first language and so it must be clear that you are fit to work.
My first letter was rejected because this line was missing and the doctor had listed every minor medical incidence I had undergone since primary school (such as breaking my arm in 1996), which made me sound like I was on my death bed. The second letter stating simply “Tom is fit to work abroad” was accepted!
Step 2: Have the authenticity of every page of each document certified by a Notary Public
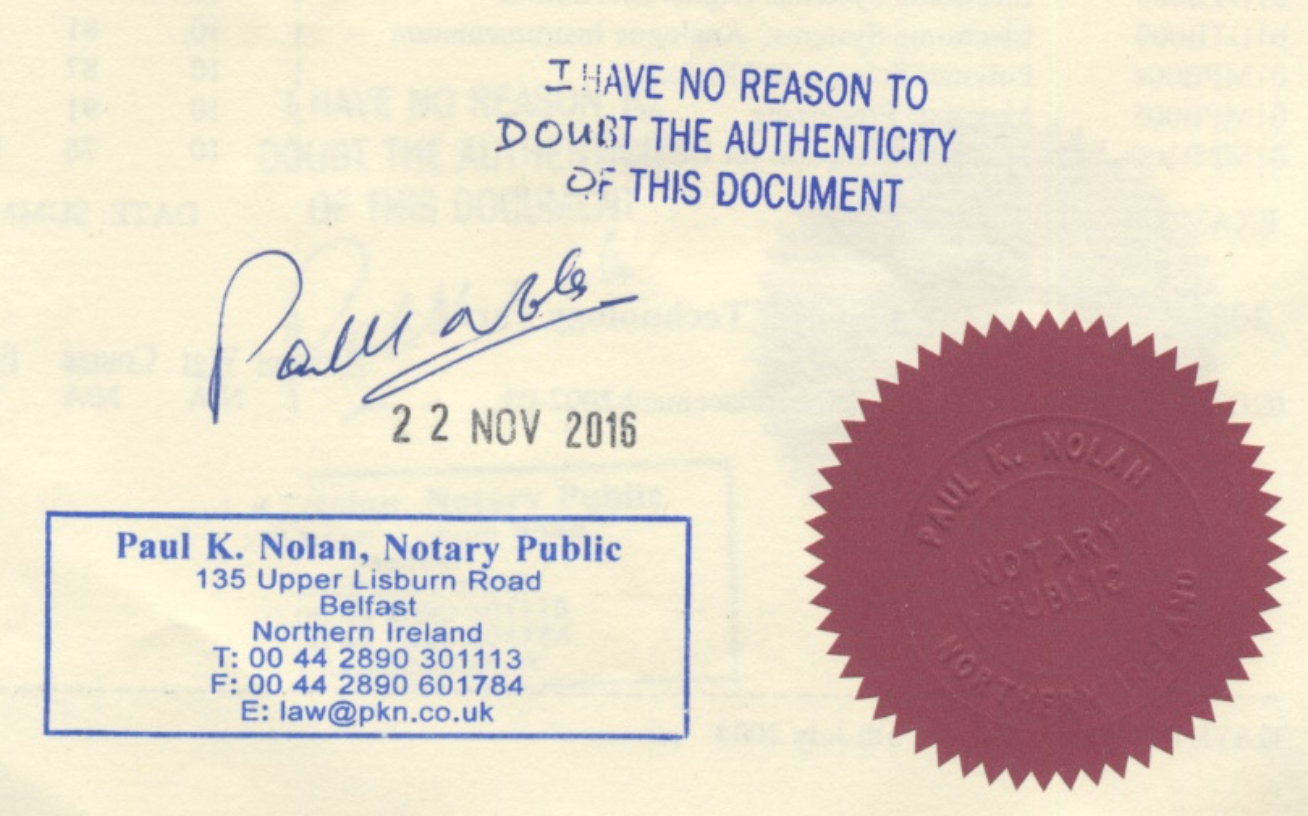
Example of the stamp provided by the Notary Public on the back of my degree certificate
The second stage is to take all your original documentation that is NOT an official government document to a Solicitor or Notary Public and have them “certify” the document is genuine to the best of their knowledge.
These documents will be – Degree Certificate, Degree Transcript, Letter from University and Doctors Letter. Your Police Check and Marriage Certificate are issued by the government so are in a standard format that the embassy will recognise.
This process is usually used when you want to send a photocopy of an original document somewhere and the person receiving it wants to know it is a real copy. In this case the Notary Public stamps the photocopy. However, like many things in Qatar it was difficult to ascertain if original documents needed to be certified as well so in the end I decided to get all my originals certified anyway. In my case, the notary public stamped my original documents on the back so as not to damage the original.
While it might seem like overkill it is important to make sure that every page of each document is certified at every step of the process. I have heard of people having documents returned because one page was missing the required stamp. Make sure this happens for every page at every step just to be sure.
Step 3: Have the authenticity of every page of each document attested by the government of the country in which it was issued
Since all my documents were issued in the UK I needed to submit them all to the Foreign and Commonwealth Office (FCO). This involved going to their website HERE and following the step by step instructions. It cost me £30 per document (as of 2017). To avoid wasting time if I made a mistake I counted each page as a separate document so, for example, my degree certificate (1), transcript (2) and the letter from my university (1) were each separate documents (4x£30 = £120). In total, I had 6 pages of documents and after paying and printing the cover split sent it all off by Royal Mail Special Delivery. 5 Days later I got my documents back with the white “Apostille” from the FCO on the back.
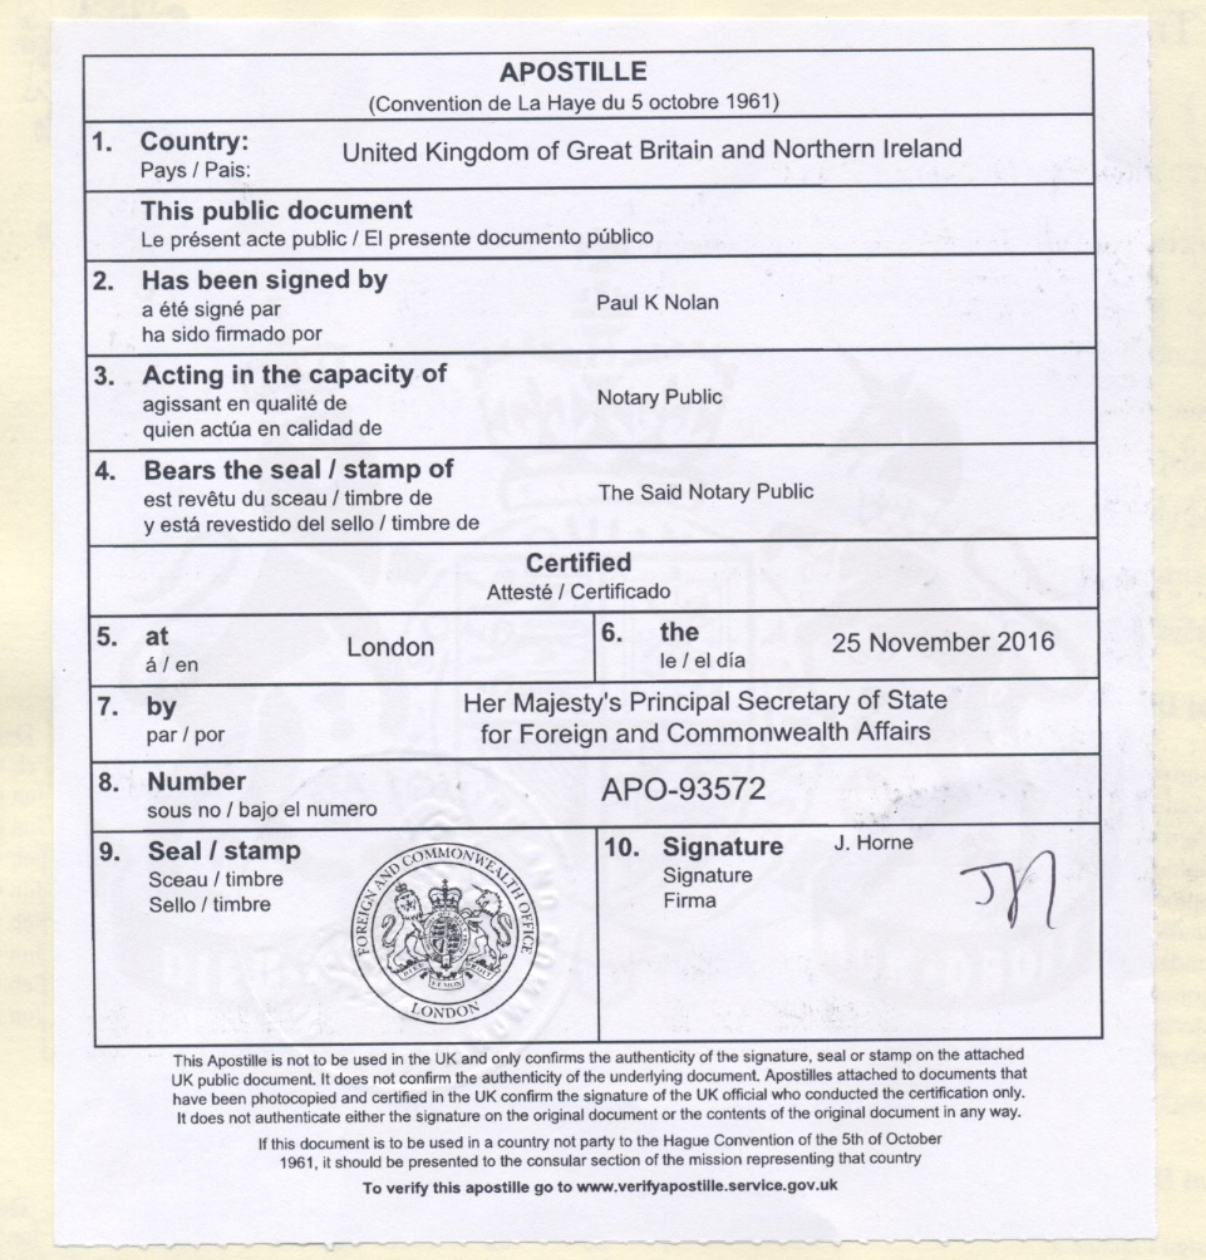
Example of Apostille issued by the British Foreign and Commonwealth Office
Step 4: Have the authenticity of every page of each document attested by the Qatar Ministry of Foreign Affairs
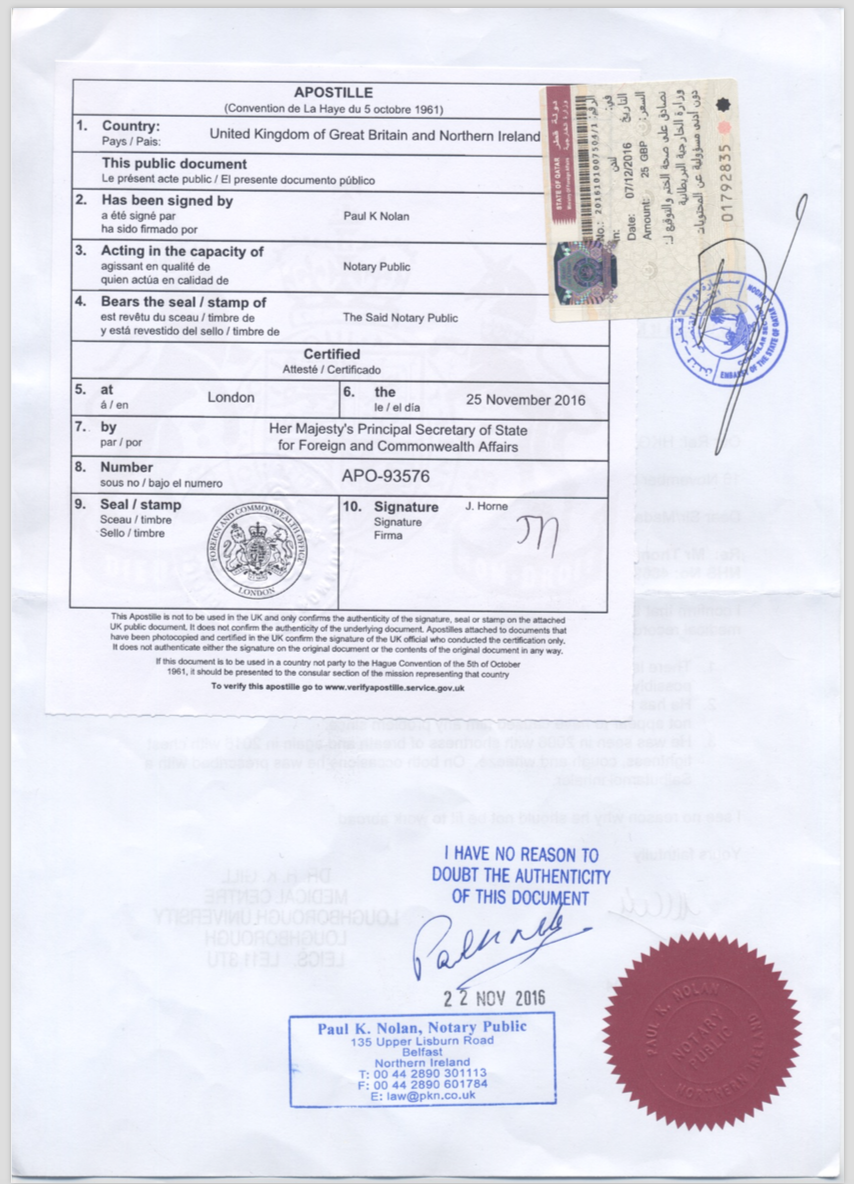
Example of a fully attested document showing all three stamps from the Notary Public, FCO and Qatar Embassy!
The final step in this long process is to send your documents to the Qatar Ministry of Foreign Affairs in your home country. Mine was done in London via their website HERE. It is really important to read the details regarding what they require carefully. I used their tracking system for non-commercial documents. Each sheet cost me £25 so it was £150 for all six sheets. I then went to the Post Office to get a postal order for £150 and sent this along with the covering letter, a self-addressed special delivery envelope and the six document sheets to the embassy by Royal Mail special delivery. About a week later my documents were returned fully stamped!
Now all that was left to do was to scan every sheet front and back and send it off to my employer. At this point, I was then issued a visa to enter Qatar and told to bring all the original documents with me when I arrived!
Mission Completed!
In total this entire process took me five weeks and cost around £400. For me, the key thing was to avoid mistakes by making sure nothing was returned to me and then had to be sent again. You can find companies that will do a lot of the final two steps for you but I was quoted £1500 for the privilege and decided it was not worth it. Also these services often actually take longer than you doing it yourself because they need to undertake their own administration alongside the other steps!
Recent Comments